

The Motion Sickness Conundrum
When iOS 7 was released, Apple moved away from Skeuomorphism and towards minimalism. This was a welcome change at the time, which brought solutions to certain design crimes that prevailed and one very peculiar problem — Motion Sickness.
There were alotof reports and criticism because of a feature called Parallax, which among other things was a cause of concern for Apple at the time. Of course, this was fixed in iOS 7.1 by a simple accessibility setting which could be turned off.
Parallax, when used right, could be key to offering a sense of depth while making sure the experience is unperturbed. Let’s check out how to craft delightful experiences using motion instead of headaches. The key is to keep is subtle.
Also, incase you just want to see code, there’s an Xcode project at the end of the post, feel free to download and check it out.
The Basics
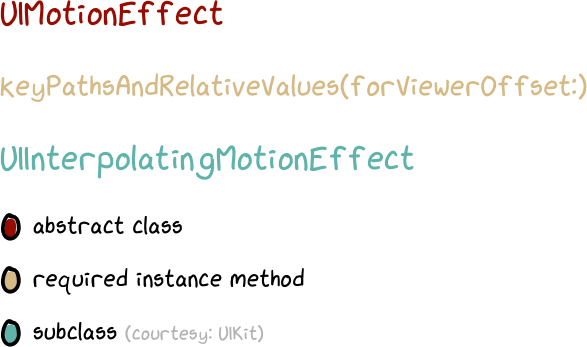
The Boss Class behind the parallax sensation is UIMotionEffect. This is an abstract class, which means it cannot be instantiated directly, which means you have to subclass it.
There’s a particular method keyPathsAndRelativeValues(forViewerOffset:) which needs to be implemented by all subclasses of UIMotionEffect in order for the system to be able to do what you want it to.
This method basically returns a dictionary of view properties/keypaths which are animatable and values by which the property will be modified based on a parameter called viewerOffset.
The parameter viewerOffset is of type UIOffset which is passed by the system to the method we have been talking about when there’s a subclass of UIMotionEffect present.
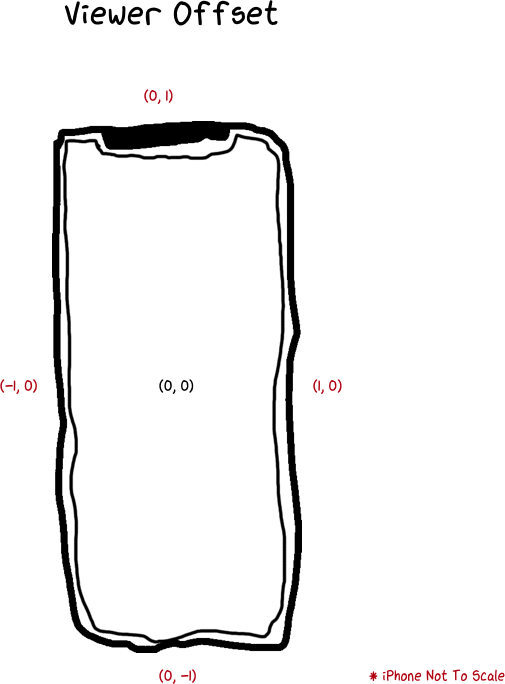
The viewerOffset property has two offsets based on the direction that the device is facing with respect to its viewer:
- Horizontal Offset (which ranges from
(-1, 0)to(1, 0)) - Vertical Offset (which ranges from
(0, -1)to(0, 1))
When the screen is directly pointed at the user, the viewerOffset value is at (0, 0). This property changes over the range based on how the user holds the device and it’s tilt.
Here’s a scruffy looking illustration showing how the offset varies along the axes:
Once you comprehend this bit, it’s just a matter of applying this concept to your views using the API, which in my opinion, is quite straightforward.
Dealing with key paths and values for simple cases can be cumbersome. Looks like someone else also thought so at Apple because of which UIKit comes with a subclass of UIMotionEffect which already has this method implemented, which is UIInterpolatingMotionEffect.
The Recipe
Thanks to UIKit, we have access to UIInterpolatingMotionEffect which lets us create motion effects very easily. For instance, it’s quite easy to create parallax effects like this:
The process for implementing something like this would be:
- Create an instance of
UIInterpolatingMotionEffectby passing a keypath you want to animate and the axis along which the motion needs to be tracked - Set
minimumRelativeValueandmaximumRelativeValueproperties on the instance - Add it to your view using
addMotionEffect(effect:)method
Let’s get into implementation details now.
- You would create an instance of
UIInterpolatingMotionEffectthis way:
1let verticalInterpolatingEffect = UIInterpolatingMotionEffect(keyPath: "center.y", type: .tiltAlongVerticalAxis)
The parameters that we pass to the class are a keyPath of the view property that will be modified based on the motion along the axis that we specify in the type property.
The type property takes one of two values:
tiltAlongVerticalAxistiltAlongHorizontalAxis
- Once we have instantiated an object, we need to set the following properties on it:
minimumRelativeValuemaximumRelativeValue
These properties are of type Any? if you have noticed. For our instance to be able to alter our view’s center, which we need to be able to induce parallax effect, we pass CGFloat values which denote the minimum/maximum values returned when the viewerOffset are at their extremes say (-1, 0), (0, 1) and so forth something like this:
1verticalInterpolatingEffect.minimumRelativeValue = CGFloat(-100)2verticalInterpolatingEffect.maximumRelativeValue = CGFloat(100)
This denotes the extent to which modifications to a property can take place. The reason these properties are of type Any? because they can take values of CGFloat, or even a CATransform (by wrapping it in an NSValue object) which could give you more control over the kind of animation you could do based on the device’s tilt.
- Finally, we add the object to our view using the
addMotionEffect(effect:)method.
To do this, we could simply do:
1view.addMotionEffect(verticalInterpolatingEffect)
and get done with it. But you would notice that we modify the center only based on the movement along the vertical axis. To make sure we do this along both axes, we would need to
- Create a
horizontalInterpolatingEffectin a similar fashion by passingtiltAlongHorizontalAxisto the class - Create a Motion Effect Group
- Add both effects to the group
- Add the group to the view using the same method
Creating a motion effect group and adding effects is as simple as:
1let motionEffectsGroup = UIMotionEffectGroup()2motionEffectsGroup.motionEffects = [horizontalInterpolatingEffect, verticalInterpolatingEffect]
All that’s left to do to is adding the effects group to the view:
1view.addMotionEffect(motionEffectsGroup)
BYOC: Bring Your Own Class
Now that we know how to create simple parallax effects, we’ll see how to subclass UIInterpolatingMotionEffect by implementing a detail which tries to avoid giving people motion sickness, which kind of was the point of the article.
The answer is subtlety.
- Subclass
UIIntepolatingMotionEffect, say something likeSubtleMotionEffect - Override
keyPathsAndRelativeValues(forViewerOffset:)method to divide the offset values by 5 points to make the movement more subtle - Use objects of
SubtleMotionEffectwhile creating motion effects and add it to the view usingaddMotionEffect(effect:)
Overridden Method:
1override func keyPathsAndRelativeValues(forViewerOffset viewerOffset: UIOffset) -> [String : Any]? {23 // 14 var motionAmplitude: CGFloat = 0.056 // 27 switch self.type {8 case .tiltAlongHorizontalAxis:9 motionAmplitude = viewerOffset.horizontal10 case .tiltAlongVerticalAxis:11 motionAmplitude = viewerOffset.vertical12 }1314 //315 if (motionAmplitude > 0) {16 guard let max = (maximumRelativeValue as? CGFloat) else { return nil }17 return [self.keyPath: max * motionAmplitude / 5.0]18 } else {19 guard let min = (minimumRelativeValue as? CGFloat) else { return nil }20 return [self.keyPath: -(min) * motionAmplitude / 5.0]21 }22}
In this method, the following happens:
- We define an variable to hold our offset value
- Assign the offset to our variable based on the tilt-axis
- Return the keypath dividing the offset value by 5
This will make the effect more subtle:
This is a guide to help someone get started with UIMotionEffect covering just the basic cases of parallax motion, there’s a lot of potential to use this class in various ways to create interesting experiences and I encourage you to do it.
Feel free to leave comments, also if you want other cases of the class to be covered do let me know, if there’s enough interest I’ll consider writing another post going through this in detail.
Thanks to corsarus’ article on the same subject which helped me understand how to override the dictionary returning method.
Resources:

